
Dutch braids are one of the most popular braided styles for a reason. They look bold and polished, they keep your hair out of your face, and they work on almost every hair type, from straight and fine to thick, curly and 4C.
Quick answer: To do a Dutch braid, take a section of hair at your hairline and split it into three equal strands. Cross the right strand under the middle strand, then cross the left strand under the new middle strand. Keep adding a small piece of loose hair to each side strand before crossing it under. Continue to the nape of your neck, finish with a regular three-strand braid, and secure with an elastic.
In this guide, the team at Azmera Braiding walks you through every step, plus tips for braiding your own hair, natural hair and adding extensions.
What Is a Dutch Braid?
A Dutch braid is a three-strand braid that sits on top of your hair instead of lying flat. It’s made by crossing each strand under the middle strand while adding hair as you go. Because of this, it’s also called an inside-out braid or a reverse French braid.
The result is a raised, 3D braid that stands out from your head, which is why it looks so striking.
Dutch Braid vs French Braid: What’s the Difference?
The only difference is the direction you cross the strands:
| Dutch Braid | French Braid | |
|---|---|---|
| Crossing direction | Strands cross under the middle | Strands cross over the middle |
| Look | Braid pops out from the head | Braid lies flat and blends into the hair |
| Also called | Inside-out or reverse French braid | Classic braid |
| Best for | Bold, sporty, textured looks | Soft, elegant looks |
Dutch Braids and Cornrows: The Same Technique
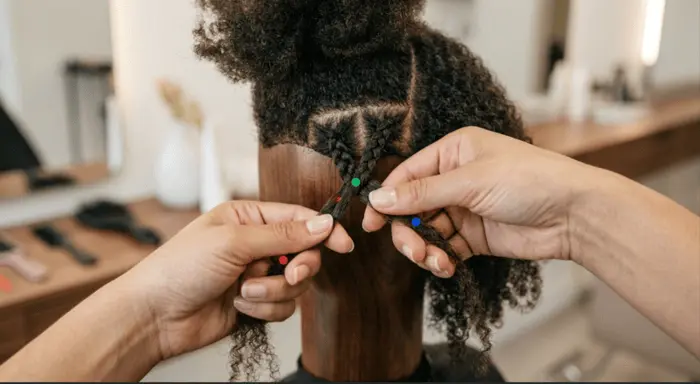
If you’ve ever had cornrows, you already know the Dutch braid technique. Cornrows are made by crossing strands under the middle, just like a Dutch braid. The main difference is size: cornrows are smaller, tighter and braided very close to the scalp, often in rows, while a Dutch braid usually uses larger sections. This underhand braiding technique has deep roots in African braiding traditions going back thousands of years.
What You’ll Need
- Detangling brush or wide-tooth comb to remove knots
- Rattail comb for clean parts
- Sectioning clips to keep extra hair out of the way
- Small elastic bands to secure the ends
- Leave-in conditioner or moisturizer, especially for natural hair
- Styling product for grip: mousse, texturizing spray or light braiding gel
- Edge control (optional) for a sleek hairline
- Mirror, or two mirrors if you’re braiding your own hair
How to Do a Dutch Braid Step by Step
Step 1: Prep Your Hair
Start with detangled hair. For straight or wavy hair, a little texturizing spray gives better grip. For curly, coily or 4C hair, apply a leave-in conditioner and stretch your hair first (by blow-drying on low heat, banding or braiding it overnight) so it’s easier to section and braid smoothly.
Step 2: Part Your Hair
Use a rattail comb to create your part. For one braid, brush your hair straight back. For two Dutch braids, part down the middle from forehead to nape and clip one side away.
Step 3: Take Your Starting Section
At your hairline, take a small triangle-shaped section about 1 to 2 inches wide. Split it into three equal strands: left, middle and right. The size of this first section decides how thick your braid will look.
Step 4: Make the First Underhand Cross
Cross the right strand under the middle strand. Then cross the left strand under the new middle strand. This is the move that makes it a Dutch braid.
Step 5: Add Hair and Cross Under
Before your next cross, pick up a small, even piece of loose hair from the right side of your head and add it to the right strand. Cross that thicker strand under the middle. Then do the same on the left side: add hair and cross under the middle.
Step 6: Keep Going Down the Head
Repeat Step 5, working toward the nape of your neck. Keep your hands close to your scalp and your pick-up sections the same size each time. Even sections and even tension make a neat, symmetrical braid.
Step 7: Finish With a Regular Braid
When you reach the nape and there’s no more loose hair to add, keep braiding to the ends using the same underhand crosses. Secure it with a small elastic.
Step 8: Finish and Style
Smooth flyaways with a little edge control or gel. For a fuller look, gently pull the outer loops of the braid to widen it (called pancaking). Skip pancaking if you want a sleek, long-lasting braid.
How to Dutch Braid Your Own Hair
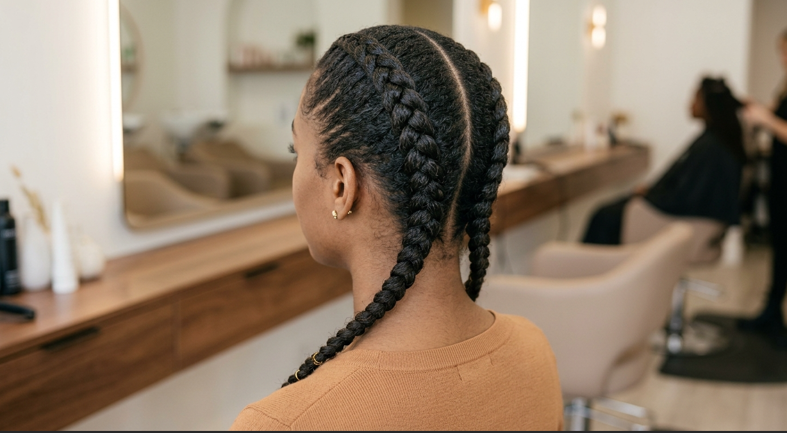
Braiding your own hair feels awkward at first because your arms are raised and you can’t see the back. These tips make it easier:
- Start with two braids, not one. Two side braids are much easier to see and reach than a single braid down the middle.
- Use two mirrors so you can check the back.
- Rest your elbows if your arms get tired. Take a break while holding the strands.
- Learn by feel. Watch your hands in the mirror at first, then practice with your eyes closed. Most people braid their own hair by touch.
- Practice on a friend or wig first to learn the pattern.
Dutch Braids on Natural and Textured Hair
Natural and 4C hair holds Dutch braids beautifully and often lasts longer than straight hair because the texture grips well. For the best results:
- Always moisturize with a leave-in before braiding
- Stretch your hair first for smoother, neater braids
- Use a light gel or braiding cream on each section for grip and shine
- Don’t pull too tight, especially around your edges
- Wrap your hair in a satin scarf or bonnet at night
Feed-In Dutch Braids With Extensions
If you want longer, thicker braids, you can add braiding hair as you go. This style is often called feed-in braids or boxer braids with extensions. You start with your natural hair, then gradually feed in small pieces of extension hair as you pick up new sections. The braid gets fuller as it goes down, while the start stays natural and flat against your hairline.
Feed-in braids take more skill and practice to look neat. They’re also one of the most requested styles at Azmera Braiding because a professional install looks smooth, lasts longer and puts less tension on your scalp.
Common Dutch Braid Mistakes and How to Fix Them
- Braid looks flat: You’re crossing over instead of under. Every cross must go under the middle strand.
- Braid is lumpy or uneven: Your pick-up sections are different sizes. Keep them small and equal.
- Braid falls out quickly: Your tension is too loose, or your hair is too slippery. Braid closer to the scalp and use a grip product.
- Braid wanders to one side: Keep your hands centered over your part line as you work down.
- Scalp hurts afterward: The braid is too tight. Loosen it right away to protect your edges.
Frequently Asked Questions
How to Dutch braids step by step?
Split a section at your hairline into three strands. Cross the right strand under the middle, then the left strand under the middle. Before each new cross, add a small piece of loose hair to the outside strand. Continue to the nape, finish with a regular braid crossing under, and secure with an elastic.
Which is harder, Dutch or French braid?
Neither is harder. They use the same steps, just in opposite directions. French braids cross strands over the middle, while Dutch braids cross under. Most people find whichever they learn first feels easier. Dutch braids can feel slightly awkward at first because crossing under isn’t how most people learn a basic braid.
Is a Dutch braid hard to learn?
No. If you can do a basic three-strand braid, you can learn a Dutch braid. Most beginners get the pattern within a few practice sessions. Making it look neat and even on your own head takes more practice, usually a week or two of regular tries.
Is it easier to French or Dutch braid on yourself?
Many people find Dutch braids easier on themselves. Because the strands cross under, the braid sits on top of your hair, so it’s easier to feel your progress with your fingers. Dutch braids also look bold even if they’re slightly uneven, which makes small mistakes less noticeable.
Are Dutch braids damaging to hair?
Dutch braids are not damaging when done correctly. They can protect your ends and reduce daily styling. Damage happens when braids are too tight, worn too long, or done on dry, tangled hair. Tight braiding can pull on your edges and cause traction alopecia, so braid firmly but never painfully.
What is the hardest braid to learn?
The five-strand braid is often seen as the hardest because you’re managing five sections at once. Other advanced styles include the fishtail braid on yourself, the waterfall braid, and micro braids. Feed-in braids and neat cornrows also take real practice to look professional.
Do you go under or over for Dutch braids?
You go under. In a Dutch braid, each side strand crosses under the middle strand. That’s what makes the braid stand out from your head. If you cross over, you’re doing a French braid instead.
What is the easiest braid for beginners?
The classic three-strand braid is the easiest to learn. You simply cross the left and right strands over the middle, one at a time, without adding any extra hair. Once you’re comfortable with that, the French braid and Dutch braid are the natural next steps.
How long do Dutch braids usually last?
On straight or fine hair, Dutch braids usually last 1 to 3 days. On textured, curly or natural hair, they can last up to 1 to 2 weeks with care. Feed-in Dutch braids with extensions often last 2 to 3 weeks. Wearing a satin bonnet at night helps them last longer.
What is the prettiest type of braid?
It depends on your style. Popular favorites include Dutch crown braids, waterfall braids, goddess braids, Fulani braids and knotless braids. Dutch braids are loved for their bold, raised look, while waterfall and crown braids are favorites for weddings and special events.
How long does it take to do a Dutch braid?
A single Dutch braid takes about 5 to 15 minutes once you know the technique. Two braids on yourself may take 20 to 40 minutes as a beginner. Feed-in Dutch braids with extensions at a salon usually take 45 minutes to 1.5 hours, depending on length and number of braids.
Which braids hurt the least?
Knotless braids usually hurt the least because they start with your natural hair and add extension hair gradually, putting less weight on your roots. Loose Dutch braids, larger braids and lightweight styles are also gentle. Any braid that’s installed with light tension shouldn’t hurt at all.